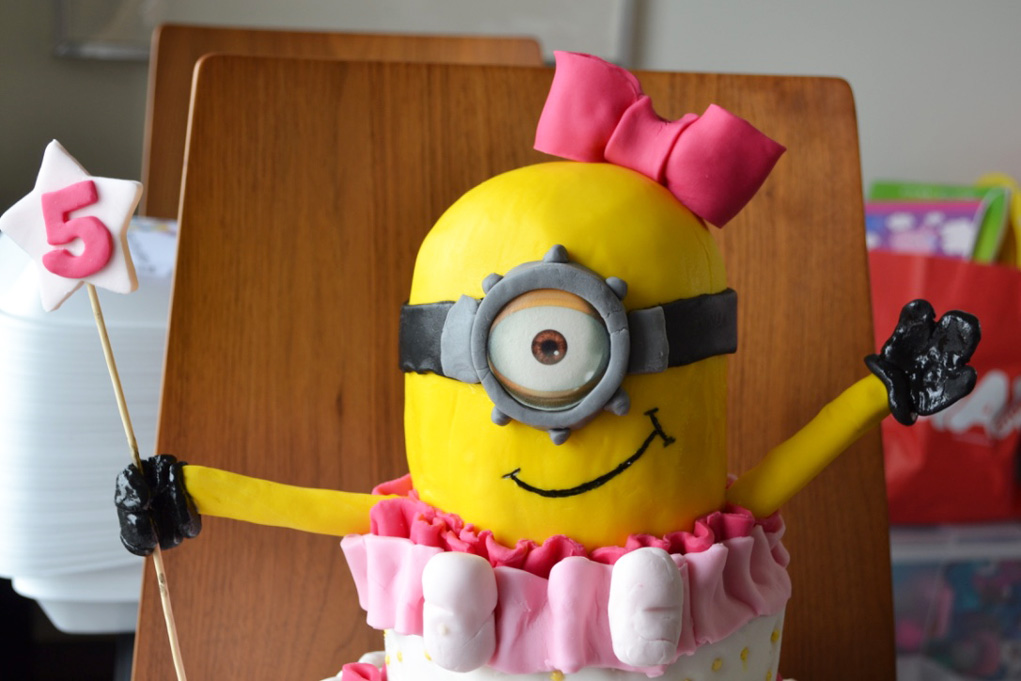

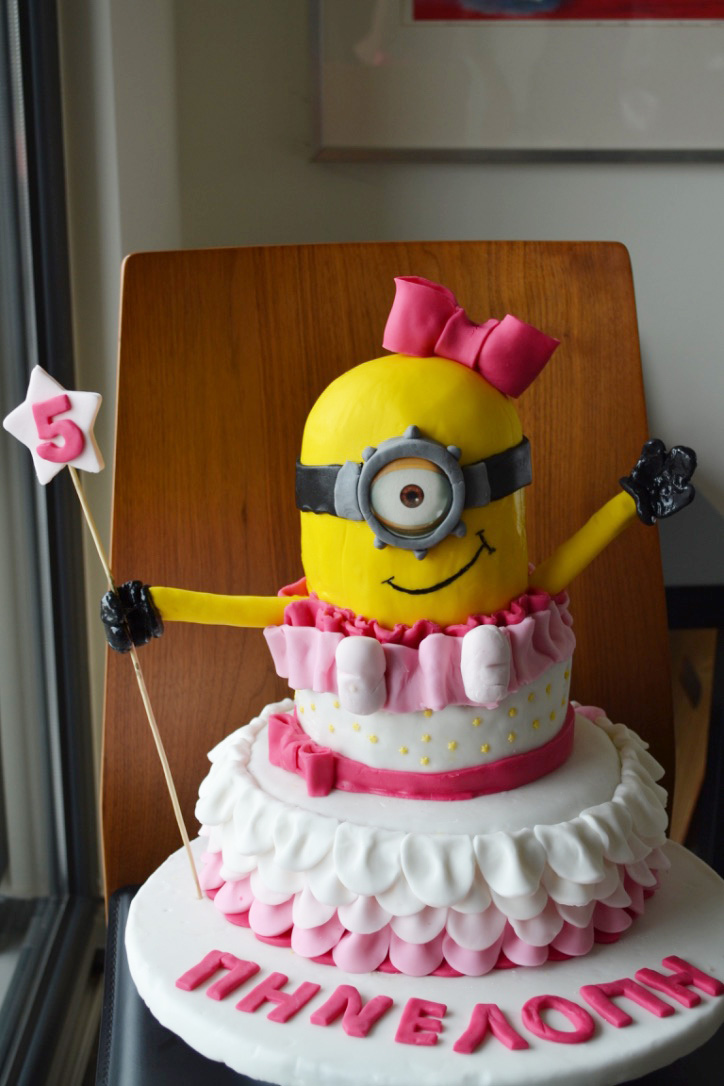
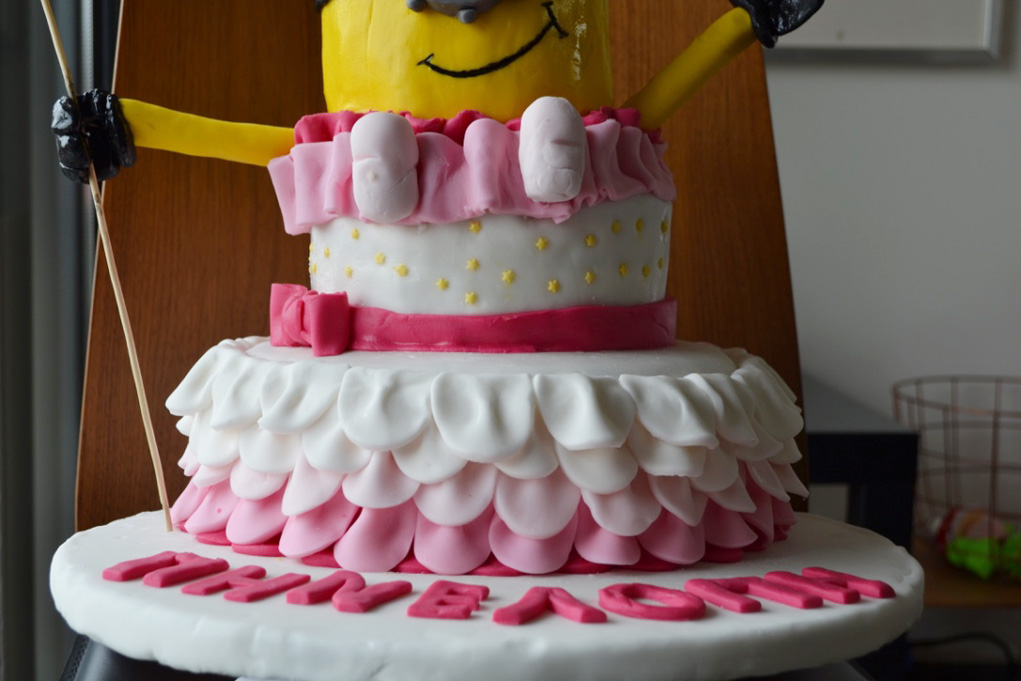
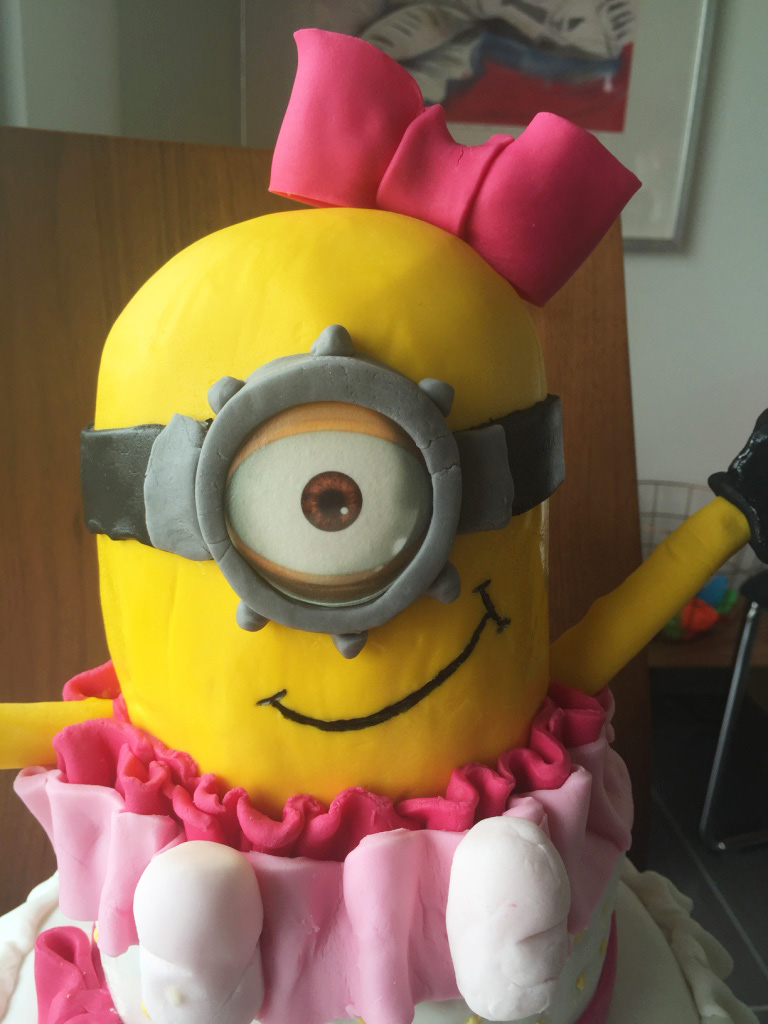
I just keep on posting this week after being absent for so long… feels like I met up again with my bestie and want to share all the news at once with one breath… So after telling you all about Penelope’s Minion Party Planning, the cookies and the cupcakes I could only end up with the cake…Our first three-storey cake. I won’t tell you come on it is so easy to make because it wasn’t at least for me. However I can say that it is doable. You just need time, good time management and a lot of patience. And of course help. If it wasn’t for Yiannis I probably could never managed to cope. It was so heavy I could’t even carry it.
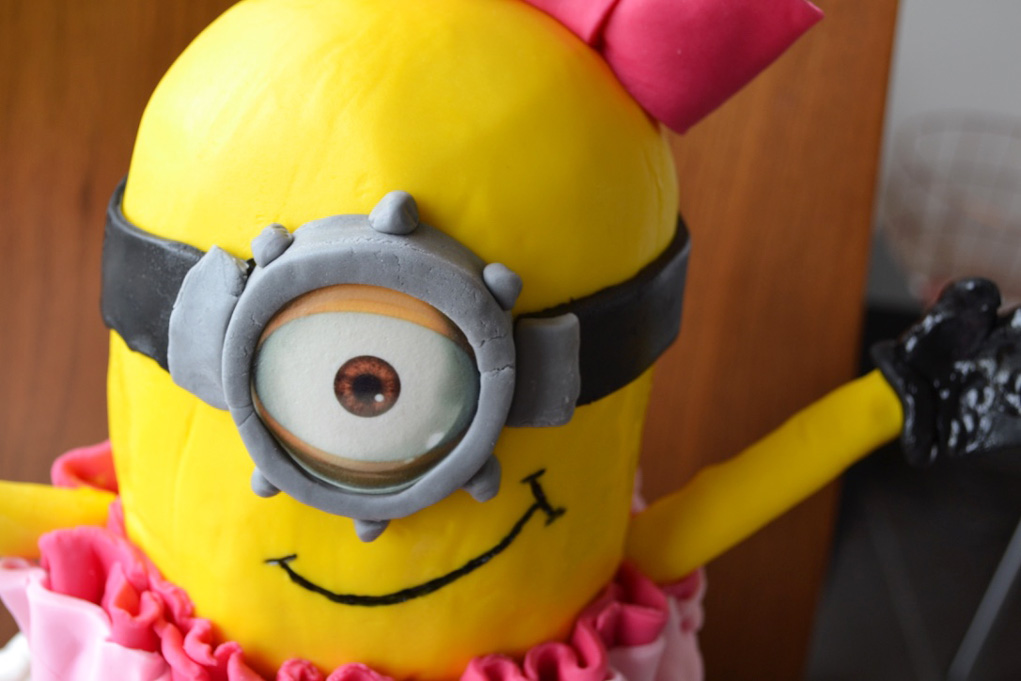
This time I wanted to experiment with the cake recipe… epic fail for me I didn’t like the result. This is why I won’t analyze the recipe. I can tell you where I got it. I got it from here. You can use it if you like but don’t say I didn’t tell you so… On the other hand the chocolate mousse recipe I used was amazing. It is this one and I definitely recommend it. I made a twist and added three tablespoon of my favoring strawberry Nesquik and it become the ultimate strawberry mouse. For the three-storey cake I used 4times the ingredients of the cake and 1 of the white (strawberry) chocolate mousse. The covering of the cake layers was made with buttercream using my usual recipe. I used 3times the ingredients. How many sugar paste I used for this cake…let’s see.. about 1kg white, 500gr bright yellow, 400gr fuchsia, 250gr pale pink, 100gr grey and 100gr black. I got them for two stores (these one and that one). The minion’s eye is made with edible print out using a small size of this pic and ordered for here. Minion’s smile was made with edible black pen that I got from one of the above linked stores. So let’s go through some tips and tricks I learned from making this cake:
Tip 1: Plan Ahead. This type demands a serious amount of time. If you do not spare time, I strongly suggest you start early planing and preparing the cake. You can start from the deco details of the cake. You can preserve them in ari-tight food containers. During the heat you can even put them in the fridge. Another big secret for the cake’s deco is a magic ingredient: tylo powder. A magic little think that can harden the sugar paste and transform it in modeling sugar paste. The proportion is 1/2 tsp of tylo powder for every 200gr sugar paste. The star on the stick, the hands and feet all were made using this type of modeling sugar paste. The star was placed on a bamboo stick before the sugar paste got hard. The rest of the staff were place in toothpicks so they can be placed on the cake with safety. The minions skirt was made from round pieces of sugar paste and placed them in rows in a air-tight food container with cooking paper between the rows. Check out his tutorial for the bow. All baking and cake decoration details were made 4 days before the party. The cakes were put in the fridge covered in wrapping plastic.
Tip 2: Supporting the cake: usually I do not use dowels in my cake but this one was 3 storey high and I just couldn’t risk it. I placed 4 large mini dowels with pointy side up. My minion fairy was going to stay pout. The base of the cake was covered with sugarpaste and before starting to build the cakes I placed somer buttercream underneath as glue.
Tip 3 : Storing the cake: Always in a paper box in the fridge. And where can we find such a tall box to cover the whole cake? In the links above you may find boxes that can fit tall cakes. Also, I suggest that you cover with sugarpaste on the every end, the same day if possible. This will keep the paste fresh and with no leaking of the colors.
Finally you can check out this video where there is the whole construction of such a cake.
Seeing the pictures again I keep on wondering how did I ever managed to pull of such a cake!! And if I can do it so can you !! Good luck!